
In a succession of my blog series “Content about Content Hub”, here I will explain how to set up Web Client SDK for importing assets programmatically.
Although the Content Hub provides out-of-the-box functionality to import data from different sources. But, sometimes client requirements can not be encountered with supplied options in the tool. So, we need to customize/create new functionalities.
The Sitecore Content Hub provides robust REST APIs to customize/create the functionalities as per business needs. To integrate with these APIs, one needs to use Web Client SDK.
Get Started with Web Client SDK
The Web Client SDK can be added by using a NuGet package source and then importing it into the projects in Visual Studio. We need to specify the public feed URL (https://slpartners.myget.org/F/m-public/api/v3/index.json) at the NuGet Package Manager Settings window in Visual Studio, as pictured below.

After installing the package into the projects, the next step is to create an OAuth client in Sitecore Content Hub and implement the code to connect with Content Hub.
Authentication – Setup OAuth
To connect with the Content Hub programmatically we need to authenticate first. For authentication, the Content Hub uses OAuth 2.0 authorization framework. OAuth is an open standard, commonly used by Internet users to grant access to their information available on other sites.
To set up OAuth clients, the user needs to choose the OAuth clients option which is available on the Manage page. The same is portrayed below.
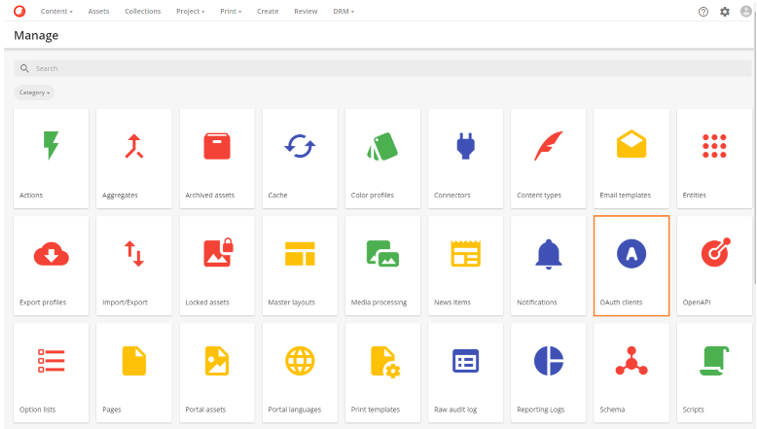
After clicking the OAuth Client, the New OAuth Client window (as displayed below) will be opened where we need to provide inputs to all the available fields.
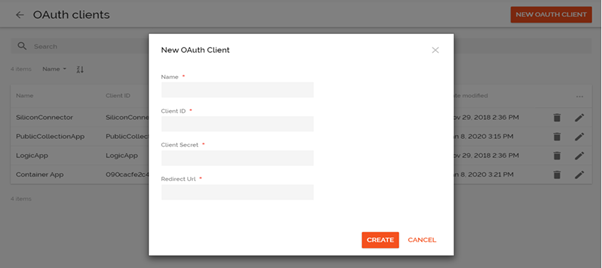
To create OAuth Client, the following properties need to be provided:
- Name: Name of the client
- Client Id: This can be any text. It will be used when creating a connection to Content Hub.
- Client Secret: This can be any text. It will be used when creating a connection to Content Hub.
- Redirect Url: The Redirect URL is a mandatory field.
After clicking on Create button, the new OAuth Client will get created and listed in the OAuth Clients listing. The next part is where we should start writing the code.
Password Authentication
To start with, we need to first create a console application in Visual Studio and need to Add NuGet package Stylelabs.M.Sdk.WebClient through Manage NuGet Packages for Project in Visual Studio.
As a next step, we need to write code that will connect to Sitecore Content Hub. The code that needs to be implemented is indicated below.
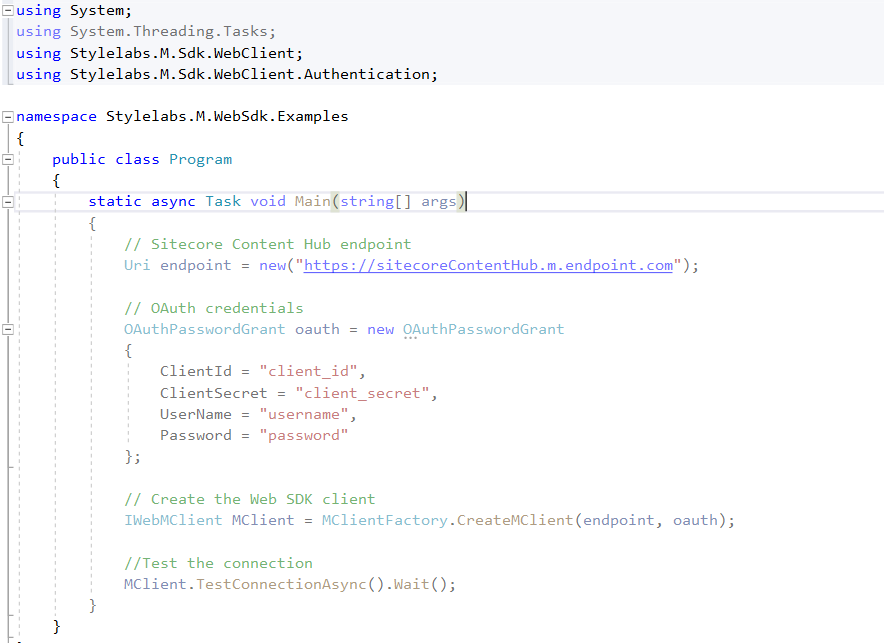
In the above code, references to the following two namespaces have been added.
- Stylelabs.M.Sdk.WebClient
- Stylelabs.M.Sdk.WebClient.Authentication
To test the connection we should use TestConnectionAsync() method. In case of failure, it will throw an exception that will specify the cause of failure. This method will check the following scenarios:
- Whether the credentials are correct
- Whether the client can successfully connect to the server
- Whether the SDK and the server are version compatible
- Whether the server is running
This is how a connection to Sitecore Content Hub can be established through the code. In my upcoming blog, I will explain how to create custom entity definitions and entities programmatically.
Keep an eye on this………..


