As we have discussed in other blogs, Sitecore Commerce is built for extension. It allows you to build and add features by creating plugins.
In this post, I am going to describe how to set up your Sitecore Commerce development environment and start using Commerce Engine SDK for development. If you want to run “Business Tools”/Storefront using SDK, don’t miss the steps highlighted in ‘RED’ towards the end of this blog.
In the next topic in this series, I will explain how to create a new plugin for Sitecore Commerce.
This post assumes that you have already downloaded Sitecore Commerce 9.3 initial release and installed it as per the instructions here
I am using Visual Studio, 2019.
With further ado, let’s get to the steps to set up the SDK.
Step 1- Extract Commerce Engine SDK
Sitecore Commerce installation package comes with Sitecore Commerce Engine SDK.
- Copy the downloaded SDK Sitecore.Commerce.Engine.SDK.5.0.76.zip on your development folder. If needed, you can download the same here
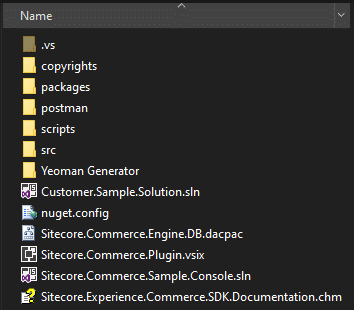
- Extract Sitecore.Commerce.Engine.SDK.5.0.76.zip, the output will look like this –

Step 2 – Setup Visual Studio Solution
- From the extracted folder open ‘Customer.Sample.Solution.sln’ solution.
- Configure NuGet package to https://sitecore.myget.org/F/sc-commerce-packages/api/v3/index.json
- Build the Solution. It should restore the package and build successfully.
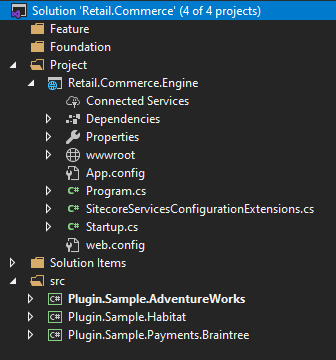
Steps below are recommended for proper development setup, you can skip these steps in case you are just playing around – - (optional)Rename the Solution. In this case, I have renamed to Retail. Commerce
- (Optional) Create a solution folder “Project” and move Sitecore.Commerce.Engine project
- (Optional) Rename “Sitecore.Commerce.Engine” project to “Retail.Commerce.Engine”. Re reference AdventureWorks, Habitat and BrainTree projects if required. Adjust/rename namespace in classes.
- (Optional) Create Foundation and Feature projects. Build the solution again.

Step 3 – Generate Development Certificate
Generate development certificate using the following script –
“New-DevelopmentCertificate”, so the localhost runs on SSL(https)
- Open PowerShell console as an admin and navigate to the scripts folder.
- Execute New-DevelopmentCertificate script
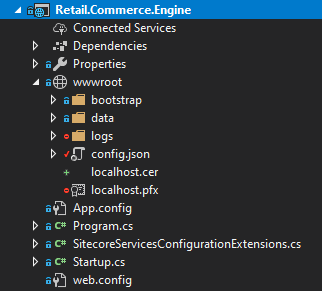
- Change the Path($certificateOutputDirectory) if required. Certificate should be copied to \src\Project\Engine\code\wwwroot


Step 4 – Update configuration
- Change the “environment” in Engine project/wwwroot/config.json file to HabitatAuthoring
- Change “SitecoreIdentityServerUrl”: “https://storefront930.identityserver.local”
- Add/Update the site(storefront) name (e.g.:-http://sxa.storefront.com) in AllowedOrigins in config.json
- Add/Update business tool url to Allowed Origin e.g.:- https://bizfx.sc910.qa
- Open Global.json in wwwroot/bootstrap folder in Engine project
The steps above will allow you to use the installed identity server to server request from IIS. - Update SQL Server, UserName and Password in EntityStoreSqlPolicy
- Check the database name

7. Update Host to your site hostname in SitecoreConnectionPolicy

Note: You may copy the config.json and gloal.json file from Authoring Site hosted in IIS to your project, but to better understand the changes required I have noted the changes.
Step 5 – Update allowed origins in Identity Site
- Open Sitecore.Commerce.IdentityServer.Host.xml file. Should be in <identityserversite>/config/production/Sitecore.Commerce.IdentityServer.Host.xml
- Navigate to section <CommerceEngineConnectClient> <AllowedCorsOrigins>
- Add https://localhost:5000 to the <AllowedCorsOriginsGroup1>
Step 6 – Ready for running the Engine
- Set Engine as your Startup Project
- Change the debug profile to “Engine” instead of “IIS Express”
- In IIS stop Authoring site. i.e. for your default instance, it might be CommerceAuthoring_sc930 site
- Run the Engine from Visual Studio. This will open the console.
- Once the plugins are instantiated, the solution should listen to 5000 port. At this point, you have configured Engine to run/debug from Visual Studio. Any calls from the business tool should be received by engine and console should be able to show the request that’s been received.


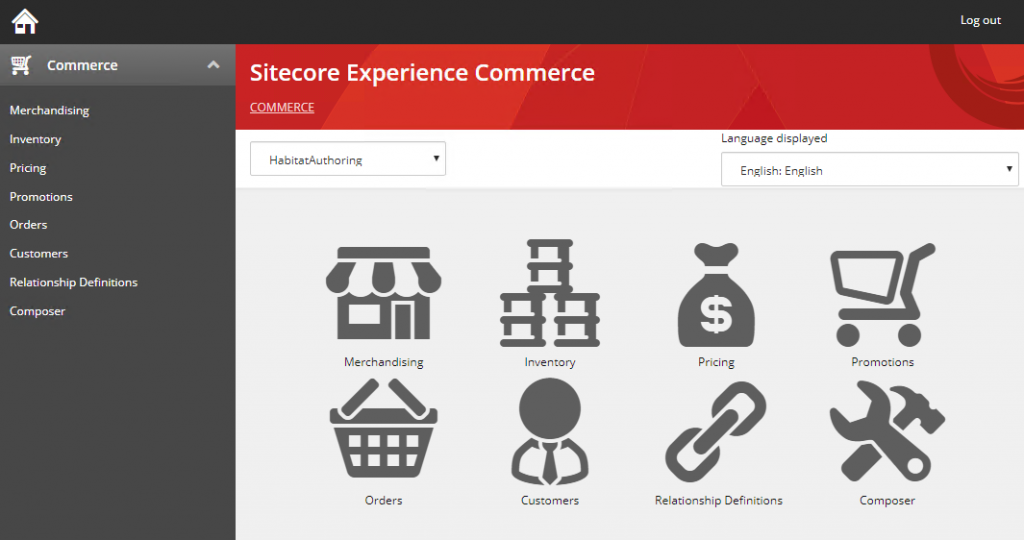
And here we have business tool sending the request to the commerce engine running on Visual Studio, see GetNavigationView() been called in the console


For Storefront to redirect calls to engine update shopsServiceUrl in Sitecore.Commerce.Engine.Connect.config file to https://localhost:5000/api/
This is a comprehensive list of steps needed to run the Sitecore Commerce engine SDK properly and you should be able to set up your environment without any issues.
In the next blog, we will set out instructions to create a new plugin.
If you come across anything that is not covered, please let us know in the comments.
Don’t forget to share and like this post on the channels below.
Assure your implementation and book a 30 mins consultation with one of our experts.
